Search the Blog
Network With ReelCast


Films For The Family

Inspirational Web Videos

Film Festival

Blog Archives
Admin Login

Entries in Editing (36)

8:00AM

Organize Your Hard Drive

Post Cover

Keeping your assets organized in your NLE is vital, but now you’ve got to organize your hard drive! Here’s a great way to do it.

Keeping your project nice and organized when editing is essential – you never know who you might have to hand the project off to, or if you might have to come back to it much, much later. If it’s not organized, headaches and cursing ensue. Keeping things organized outside of the NLE – on your hard drive or server – is just as vital for passing off a project or archiving it. Here’s a look at one potential project organization setup that I use, plus a free download of the folder structure!

organize-your-hard-drive-cover


Approvals

This folder is for non-final versions that are ready for the client to look over (usually .mp4s in my case).

Audio

There are 4 folders inside the Audio folder:

  • Mixes – specifically for mastered & mixed .wav or .aif files
  • Music - for the raw stock or original music used in the project. Even if you use a master library, I recommend copying the songs in here so they stay with the project.
  • SFX
  • VO

Documents

I put scripts, interview questions, project briefs, casting notes, etc. in here.

GFX

This folder is for any non-footage elements like logos, images, pre-rendered lower thirds/motion graphics, etc.

Masters

Directly inside the Masters folder is where I put the master .mov files – ProRes 422 HQ typically.

There’s also a subfolder called Deliverables: This folder is specifically for non-archival delivery formats needed, like H.264 for web, ProRes or XD Cam for TV station delivery, .m2v/.ac3 files for DVD, etc.

Media

Some people prefer to keep their media in a different place/drive than their projects. If you like to keep it all together, put it in this Media folder, organized by “Reel X” folders to separate card/shoot days.

Projects

This is for all project files, including Premiere/Avid/FCP/whatever, After Effects, Motion, Cinema 4D, Flash, Audition, Soundtrack Pro, etc.

I also like to add subfolders for each program, like so: PR, AE, FCP, FL, C4D, and so on, plus an XML for any XMLs created for program interchange: FCP -> Premiere/After Effects, Premiere -> Resolve, etc.

VFX

This folder is distinct from the GFX folder – I use this for any footage elements like green screen passes, background plates, or non-mograph output from After Effects or Motion (like speed changes, logo blurs, etc.)


Hopefully this system helps you easily manage all of the project assets on our drive. You can download a .zip containing an empty version of this folder structure by clicking here.

If you’d a few more organizational tips fro videographers, video editors, and filmmakers, check out the following links from PremiumBeat!

- - - - -
(Source Article by Aaron Williams)

8:00AM

Video Editing on a Zero-Dollar Budget

I as a (beginner) filmmaker usually produce films on a zero-dollar budget. Part-time work and full-time college doesn’t leave much money to spend on filmmaking. It’s hard to produce a film on a zero-dollar budget, but it is possible. Pre-production is nothing in the pocketbook. Everyone has paper, pens, and an imagination. Actual production is a little tougher. Usually everyone has a camera, whether it is a smartphone, mirrorless, or a DSLR. But if you need costumes, props, or even a good microphone, then the wallet takes a dent. But in post-production is where things get difficult. Creative toolkits like Adobe Creative Cloud offer applications like Premiere Pro and After Effects that the big kids use. There is a free trial, but after 30 days of using it you grow so accustomed to it that everything else looks lame. But there are alternatives out there for editing, and best of all, they’re free!

Non-Linear Video Editors

Non-linear is just a fancy word for editing non-destructively. Which is a fancy word for not damaging the original footage. Anyways, Adobe Premiere Pro is a good example of an Non-Linear Editor (NLE). Usually the standard “free” NLE would be something like iMovie on Apple products or Windows Movie Maker on Windows based products. Although both these NLEs can produce good results, I think they can limit one’s imagination. So here are three alternatives to expensive NLEs.

  1. Adobe Premiere Pro CS2 Courtesy of www.imgkid.comCourtesy of www.imgkid.com

    Yep, that’s right. Premiere Pro is at the top of this list. A while back, Adobe’s licensing servers for CS2 had a technical difficulty, and instead of fixing it, Adobe decided to release that software suite for free. Although it’s 5 versions old, it stills works like a charm. It doesn’t have some effects like Warp Stabilizer, but many of the major features are there like color correction and non-linear editing. There is versions for Windows and Mac OSX, but the version for Mac doesn’t work with newer releases of the OS. The Windows version works all the way up to Windows 10. You will need a free Adobe account to download it, but that’s worth it for the product you get.

    Download: https://helpx.adobe.com/creative-suite/kb/cs2-product-downloads.html

  2. BlackMagic DaVinci Resolve 12 Courtesy of www.cinema5d.comCourtesy of www.cinema5d.com

    DaVinci Resolve is a program designed for color correction and grading but recently has included the ability to edit video like any other NLE. Originally, this software came bundled with BlackMagic’s cameras but now they are offering a free version or a paid studio version on their website. They offer versions for Windows and Mac OSX. The software is resource intensive though, so it is recommended you have a somewhat powerful computer to use it to its full potential. Although you have to register to download the software, that is again a small price to pay for a great piece of software.

    Download: https://www.blackmagicdesign.com/products/davinciresolve

  3. HitFilm 3 Express Courtesy of Film Riot (YouTube)Courtesy of Film Riot (YouTube)

    HitFilm once started out as a professional NLE, with visual effects, and 3D compositing but now, they split the product into two separate items: Pro and Express. The Express version has all the features of the Pro version like 3D compositing, but to add effects to the program, you need to pay a small amount for a certain package. There is a free built-in effects package that covers a few things, but for serious visual effects you might want to see the next section on compositing software. They have both Windows and Mac OSX versions, but to download it, you need to share a link to their product on a social media network.

    Download: https://hitfilm.com/express

For a list of free Video Compositing Software and Audio Editing Software...Click Here.

- - - - -
(Source Article by Joe Turman)

12:00PM

Johnson Strings - Music Video

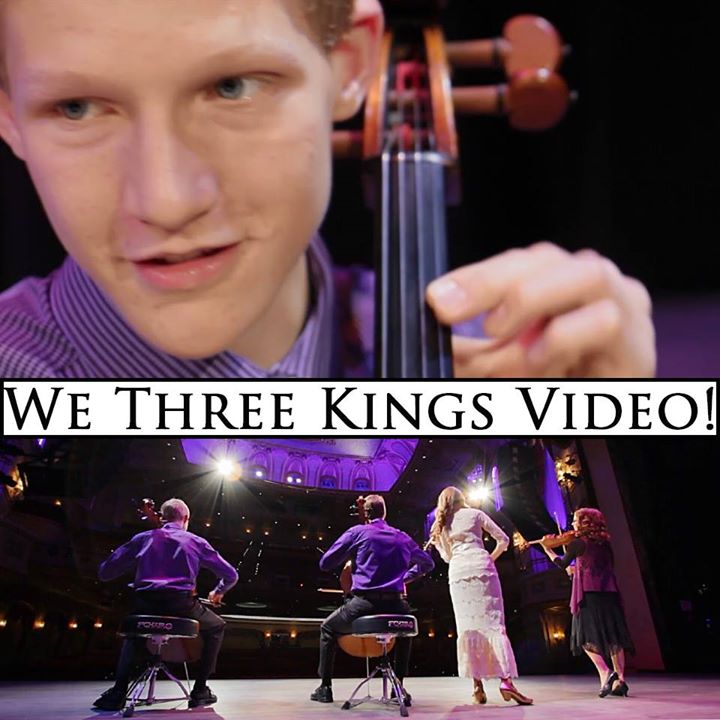
I've been working with The Johnson Strings on their next set of music videos. "We Three Kings" has just been released! (Role: Editor & Colorist)

8:00AM

3 Places To Get Free Music

A film without music is like a man without a soul. The problem is for a student film, you often don’t have much of a budget to spend on hiring a composer or licencing music. Though those are the best options, you can sometimes get away with using free music. Just be prepared to sort though a lot of – let me say – less than quality music.

Today I want to highlight 3 of the best places I know of to get free music for your films:

youtube-music

  1. The YouTube Audio Library
    Youtube has thousands of free songs you can download and use. Just make sure to keep track which of the different licences the tracks are under. Each track has instructions on whether you are required to include an attribution or not.

    vimeo-music
  2. The Vimeo Music StoreThe Vimeo Music Store also has lots of free tracks available for download. Under “Price Range” in the search filter, select “free”.

  3. The Wistia Music LibraryWistia has recently been adding more music to their library. Currently they have two albums available for download.

- - - - -
(Source Article by Andrew Bartlett)

8:01AM

Adobe Premiere Pro - 2015

Premiere Pro features a new color workspace featuring the Lumetri Color Panel, which allows editors to manipulate color and light in new and innovative ways, at any point in the editing process, without leaving the application. Combining new color technology based on SpeedGrade with familiar Lightroom-style controls, applying simple looks and manipulating parameters to achieve the perfect aesthetic has never been easier, and you’ll see beautiful results in just a click or two. You can take it further with curves and hue/saturation controls, and the new Lumetri 3-way color corrector. And if you want to do more, you can use Direct Link to take your project into SpeedGrade for additional refinements.

Unsightly jump-cuts in talking head interview footage might just be a thing of the past with the addition of Morph Cut, which uses face tracking, frame interpolation, and some Adobe magic to create seamless transitions that previously would have seemed impossible.

The introduction of CC Libraries to Premiere Pro (shown in After Effects in the link) allows you to access and use looks and graphics wherever you are. Use the amazing Project Candy mobile technology to capture the look of a location or picture, jump into Premiere Pro’s Libraries panel and see the look sync’ed via Creative Cloud, and just drag it to a clip to apply. You can easily share looks and graphics from Photoshop and elsewhere between projects, team members, and across other Adobe applications for seamless access and collaboration.

An improved workflow to bring your video projects that you created on your phone from Premiere Clip, Adobe’s editing app for iOS devices, means you’re only two clicks from bringing your project into Premiere Pro to use professional editing tools.

You can now easily toggle between new task-oriented workspaces, optimized for the task at hand (whether it be editing, color work, and more), using the new workspace switcher.

As you’ve come to expect from Premiere Pro, you can work at any resolution without needing to transcode, and a host of newly supported native formats, including new support for Canon XF-AVC, and Panasonic 4K_HS, streamlining your path to getting creative.

And the features don’t stop there. Editors who work with Closed Captions will now be able to burn them into video on export, and a number of editing refinements like the new composite preview during trim, simpler keyboard-based numerical input, Source Settings now showing as Master Clip Effects, and improved AAF exports help you focus on simply making beautiful content. You’ll also find audio routing is easier thanks to improved audio routing UI, and an improved Audition workflow featuring Dynamic Link means moving between Premiere Pro and Audition is easier and faster than ever. Users of Windows-based touch devices will benefit from the first steps being taken towards a more touch-friendly editing experience, allowing editors to perform tasks like moving clips in the timeline and scrubbing the play-head by directly touching the screen. And editors who work with third-party I/O devices will experience significant Mercury Transmit performance enhancements.

One final piece of Adobe magic allows you to alter the duration of an export by up to 10% in either direction while maintaining quality. Time Tuner lets you target the precise duration of your required output without needing to perform time-consuming micro editing, by automatically adding or removing frames in areas of low activity, providing results of the highest possible quality for broadcast and elsewhere.
- - - - -
(Source Article)

8:00AM

Stuff To Know About Codecs

(article source)
David Kong
here with another video tutorial for you, this time on codecs. I’ve found a lot of confusion and mis-information around the internet about how codecs work, how the differ, and why those differences matter.

Hopefully, this video/post will clear those up. I know it’s long, but I really wanted to break it down and explain things thoroughly, rather than just skimming the surface like a lot of tutorials do. Codecs can sound impossibly complex when all you get is a bunch of numbers and acronyms, but the main concepts at work really aren’t that complicated.

vlcsnap-00008

I explain the concepts behind different types of codecs, but I also give some real-world examples which should help you understand how these algorithms work on a practical level, pulling frames into Photoshop to break them down and examine how our codecs have changed the image.

  • What a codec is - And how it differs from a container.
  • Different types of codecs – And why I frequently use 4 different codecs on a single project.
  • Bit Depth – What it means and why it matters.
  • Chroma Subsampling – 4:4:4, 4:2:2, and 4:2:0, and when it becomes an issue.
  • Spatial Compression and Blocking – One of the most common artefacts you see with normal work.
  • Temporal Compression – Long-GOP codecs, inter-frame compression, and ALL-I codecs.
  • Lossless vs. Lossy compression – How image compression differs from data compression.
  • Bit Rate – How to calculate bit rates and the differences between kbps/kBps/Mbps/MBps.
  • Raw – Briefly, the difference between Raw, compressed, and uncompressed (this could have been a 40-minute tutorial on its own!)

8:00AM

10 Tips from Editors to Directors 

Jonny Elwyn follows-up his popular article on what editors want camera operators to do to help out the process with an equally illuminating piece, this time focusing on the director/editor relationship.

My first article on Redshark News, 11 Things Editors Wish Camera Operators Always Did, seemed to have resonated with quite a few folks, so I thought I'd put down a few more thoughts on the complex creative marriage that occurs when directors are working with editors.

As with any close creative collaboration, personality, experience and personal idiosyncrasies all play a role in shaping how successful the union will be. Sometimes those differences create insurmountable conflict; other times, cinematic magic. But it is the professional editor's role to be what the director needs them to be at any given moment, and although the editor does have the opportunity to shape the final product in momentous ways, his-or-her work should ultimately all be in service of the director’s vision and producing the best possible end result.

With that in mind, here are 10 suggestions for directors on how to get the best from their editors.

1. It's a collaborative effort.
That means I want to bring all that I have to contribute to the project. I want to engage you in lively debate about the best way to shape the project. I want you to be open to trying new ideas and new approaches. I don't want to you to see me as only a button monkey.

2. What you have isn't what you had.
The editor is the one who has to stand in the gap between what the director thinks they have or wishes they had, and what they really have. We can only cut the footage you shot. Our job is to bridge that gap as much as we can.

3. Don't tell me when to cut.
No clicks, claps, points, taps or shouts please.

4. Leave me alone.
I need time to get on with things without you in the room. To get organized, watch through the footage, find the takes I like, try things my way, try crazy things that just might work but probably won't and to have the freedom to take a crack at things without wasting your time.

5. Be available.
If you're on the phone all the time, it's hard to collaborate. I'll need some quality time with you, at the right time, to help get your feedback, thoughts and collaborative energies in a focused way. You're the director after all - it's your project.

6. Be specifically general.
When working with actors it is common practice not to tell them you hated it when they said this word in that way. You'd say "once more with feeling." With an editor, if you say "the scene feels like it lacks energy," then I can go away and do things to amp it up a bit. If you say shave 5 frames off this shot and cut in here rather than there, things tend not to work out so well. Let me fix the note in the spirit of the note.

7. Be generally specific.
Towards the end of a project, it's OK to get more specific and granular with the details of your feedback. We want to make sure you get what you want and sometimes it's easier just to sit with you and give you that, especially if either option is a viable one.

8. Do not touch the screen.

9. Share Your Wisdom.
As an editor I've learnt much of what I know about filmmaking, narrative structure and creative ju-jitsu from the directors I've worked with. Your patient sharing of hard-won wisdom is gratefully received.

10. We sometimes get things wrong.
Usually spelling. I also think my most frequent fault as an editor, when collaborating with a director, is to dismiss an idea as one that "I've already tried and it didn't work…" Instead, I would be wiser to walk through the director's version of the idea once again – either to put to rest that it really won't work, or to be pleasantly surprised that it does.
- - - - - -
(Article Source)


8:00AM

How to Make Your Editor Happier

11 things video editors wish they could say to camera operators and DOPs

RedShark welcomes editor and blogger Jonny Elwyn to its growing ranks of writers. He responds with this handy list for shooters and camera ops, of ways to keep their editors happy.

As any experienced editor will tell you, after years of sifting through hours and hours of footage (some of it good, some of it bad, some of it very ugly), there are a few key things that anyone working behind the camera can do that make our lives much easier, the project far better, and the final result something we can all be proud of. 

Of course, it's very easy for editors to turn into armchair critics. They didn't get up at 5 am to make the sunrise or drag heavy gear half way up a mountain, battling the elements just to get the perfect shot. But we do have the benefit of the perspective gained by leisurely skimming through the results of your hard graft. So here are 11 suggestions for things every editor wishes every camera operator always did, and hopefully they'll improve what you get in the can, and improve the life of editors everywhere. 

The first and last suggestions are probably the most important!

  1. Shoot for the edit  - Think in terms of sequences and storytelling. Make sure you've got an establishing wide, an interesting reveal, close ups, movement etc. If an interviewee mentioned a specific location, item, or view, try to grab that if you can. Also think in terms of triplets. Three shots most often make for a nice sequence of cutaways - two, not so much.
  2. Always roll  - It's the 'bad bits' that we often use - re-focuses, lens whacking, snippets of background audio for filling in silences, etc. - so please don't wave your hand in front of the camera to say that it's no good. We might have a use for it anyway.
  3. Don't always roll  - Editors don't love it when they have to copy, ingest, transcode and organise lots of footage that then turns out to be someone's feet, the inside of a car door, lens caps or other random things. Obviously, this isn't intentional, but if you know it's happened, please weed out the clip if you can. 
  4. Metadata matters  - Make sure that the reel names and timecode on your camera are set correctly and that they increment with each new card, tape or disc. The more information you can supply us the better. If you're keeping logging sheets or camera reports, please know we do actually look at them!
  5. Fix it in Camera  - Ensuring your white balance and colour temperature are set correctly is extremely helpful. Not only is this a pretty basic element for a professional cameraman to get right, it can be sometimes very difficult to fix in the grade later on (if the project is lucky enough to have a grade), especially under more exotic lighting conditions, for example inside a factory or under-ground parking garage. And if you want to really go wild, actually shoot a colour chart.

...(Read More)

8:00AM

Useful Tools for Editors

By Scott Simmons | March 13, 2014

If you read my Notes From the 2014 Editors Retreat post then you might have seen the mention of a session called Gearheads. This was a fun session where attendees were asked to submit some piece of gear they like or find useful. This could be hardware, software, an app, anything really. I though the Gearheads submissions would make for a great Useful Tools for Editors entry. Here’s some that I made note of.

Read the full article here!

I highly recommend checking out this list, I've used several of the suggestions myself!

12:15PM

Polycarp - Editing

I've been really busy this year working on the upcoming historical feature film, Polycarp by Henline Productions. I was the camera operator on the film last July-Aug, and I am currently working as the editor for the film alongside the director, Joe Henline!

It's still in the developing stages, but I'm excited to see where it's going, stay tuned!

PolycarpMovie.com